
Assigning a Vehicle ID allows a user to update their status directly from their TC Pro Account. Once assigned, the Vehicle ID appears in the lower left corner of their screen on the Status Button.
Assign a Vehicle ID
Requires admin access to reach the “Users” tab.
Log in to the web portal and go to Admin Features > Users.
Find the user you want to assign a Vehicle ID.
In the user profile, near the upper right, find the Vehicle ID box.
Click Select, find the vehicle ID you want, and click the + button.
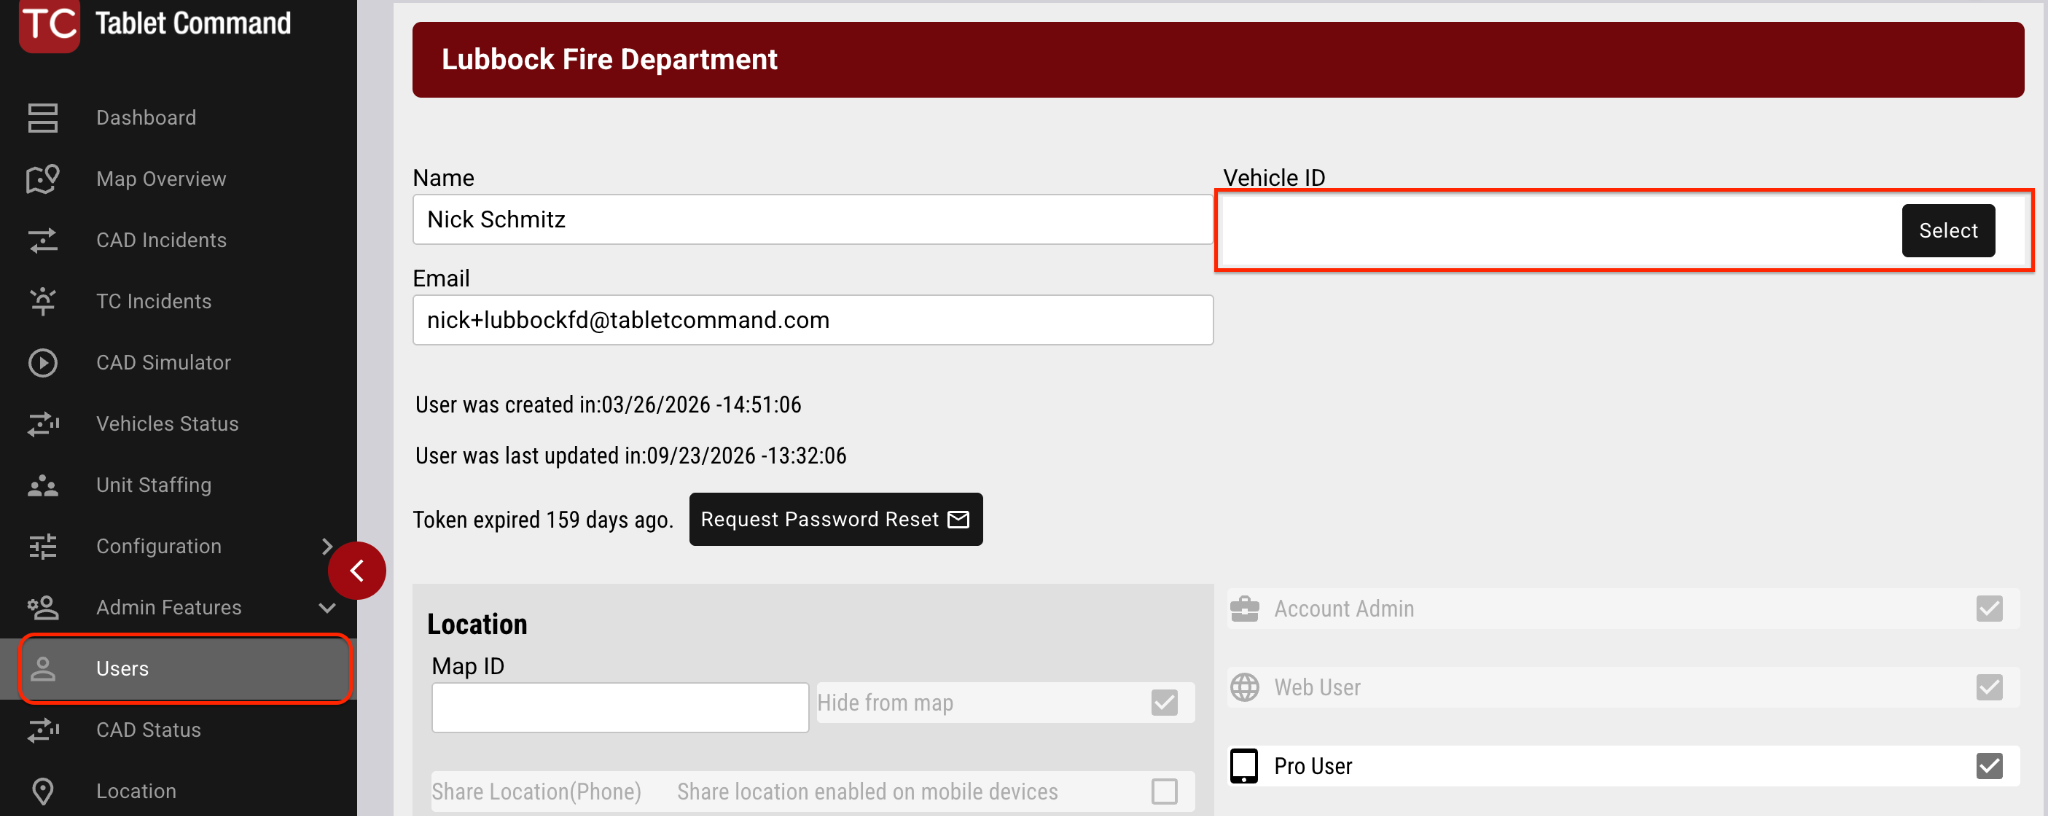
The Vehicle ID selector on the User Detail page.
Confirm It Worked
The vehicle ID should now appear in the lower left corner of the user's TC Pro screen on the Status Button and they should be able to update their status.
Note
- If the Vehicle ID you are looking for is grayed out, then it is assigned to another use and is noted on the drop down. You must release that Vehicle ID from that user prior to assigning.
- If the Vehicle ID is not available, your CAD Administrator will need to ensure the vehicle is in CAD and will likely need to status the vehicle against an incident and then restart the interface for Tablet Command to see it and make it usable.